By the way, if you have finishes to link-up for the 3rd quarter of the Finish-Along, go here.
 |
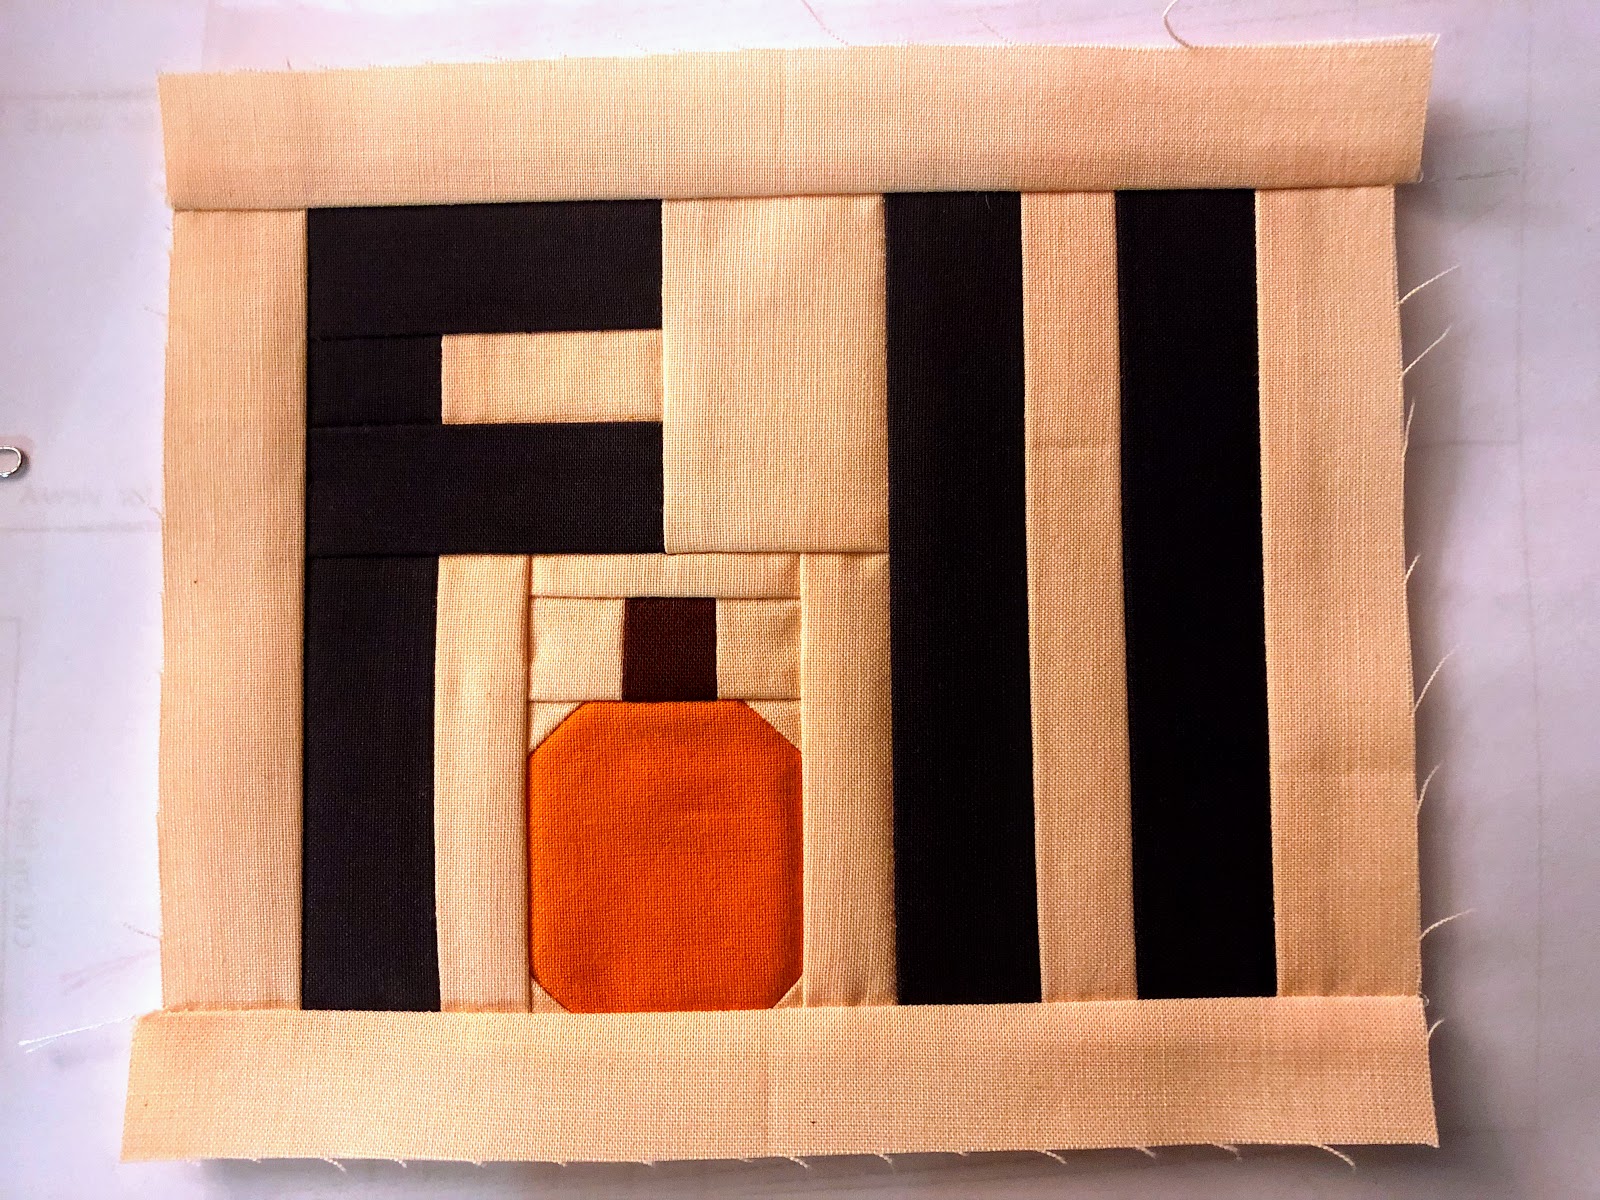
| Fall Mug Rug - Finished size: 6.5" x 7" |
This is what the finished mug rug looks like. I used scraps for mine - some Kona Black, Torch, Ice Peach and a brown. These are leftovers from the Fall themed Irish Vortex quilt I shared last week.
All right - so let's get cutting!
Orange (for the pumpkin):
- 1 rectangle 2" x 2 1/4"
Brown (for the pumpkin stem):
- 1 square 1" x 1"
Black (for the letters):
- 1 rectangle 1 1/4" x 3"
- 2 rectangles 2 1/2" x 1 1/4"
- 1 rectangle 1 1/4" x 1"
- 2 rectangles 1 1/4" x 5"
- 1 strip 2 1/4" x 30" (binding)
Peach (for the background):
- 1 rectangle 1 3/4" x 1"
- 1 rectangle 1 3/4" x 2 1/2"
- 2 rectangles 1" x 3"
- 2 squares 1" x 1"
- 1 rectangle 2" x 3/4"
- 3 rectangles 1" x 5"
- 2 rectangles 1" x 6 3/4"
- 4 squares 3/4"
When you are done, this is what you should have on your cutting mat:

We're going to piece the middle of this little mug rug in 3 parts: the top of the "F", the bottom of the "F" (which includes the little pumpkin) and the "L"s. Press all seams open or to the darkest colour.
The top of the "F"
1. Start by sewing the 1 1/4" x 1" black rectangle to the 1 3/4" x 1" background rectangle.

2. Add a 2 1/2" x 1 1/4" black rectangle to the top and bottom of the piece you just sewed.
3. Sew the 1 3/4" x 2 1/2" background rectangle to the right of the piece you sewed in step 2.

The bottom of the "F" and the small pumpkin
1. Sew a 1 1/4" x 3" black rectangle and a 1" x 3" background rectangle together.


3. Sew the 2" x 3/4" rectangle to the top of the pumpkin stem piece.

4. Next, we're going to piece the little pumpkin by making a very simple snowball block. So grab your 3/4" background squares and sew each one to a corner of your orange rectangle. The corner squares are so small, there's probably no need to mark the middle, but stitch from corner to corner and flip the background fabric so you end up with a "pumpkin" that looks like this:


5. Sew the "stem" piece to the top of your new "pumpkin" piece.

6. Finish the bottom part of the "F" by stitching the piece with the black rectangle to the left of your pumpkin and the 1" x 3" background rectangle to the right of the pumpkin.

7. Complete the "F" by stitching the top piece to the bottom piece.

Make the "L"s and complete the mug rug top
1. Sew a black 1 1/4" x 5" rectangle to either side of a 1" x 5" background rectangle to make the "L"s.

2. Sew the "F" piece to the "L"s.

3. Sew the side borders (1" x 5" background rectangles).
4. Sew the top and bottom borders (1" x 6 3/4" background rectangles).
And the top is done!
Layer it with a backing and batting rectangle. You can definitely use scraps for this!
I quilted mine with some wavy lines with the walking foot and some 40 wt orange Aurifil thread and just love the look!

To finish up the mug rug, sew the binding on by machine and finish by hand or by machine. I finished mine entirely with the machine and you can read all about how I do that over here.

Stats:
- Pattern: My own!
- Size: 6.5" x 7"
- Fabrics: All scraps
- Thread: Pieced with Aurifil #2600 (light grey) in 50 wt and quilted with Aurifil # 2150 (orange) in 40 wt.

I will be linking up to a few places this week! Check them out if you are looking for some inspiration.
Sarah Goer Quilts for TGIFF
Super cute! Thanks for sharing.
ReplyDeleteWhat a cute and clever design!
ReplyDeleteSuch cuteness, Izzy! I love the wavy orange stitching too!!
ReplyDeleteVery fun! Thanks for sharing!
ReplyDeleteThis is so cute!
ReplyDeletePEIMQG is participating in a Mug Rug Swap with another Guild right now. This would be a perfect pattern to make. It’s really cute. Thanks for putting it out there
ReplyDeleteAdorable project. . .of course, pumpkins this time of year are always great! :) Thanks for sharing such a detailed post!
ReplyDeleteThis is the cutest! Well done Izzy!
ReplyDeleteThis is so cute, I love the little pumpkin!
ReplyDeleteSuper cute. Thanks for sharing!!
ReplyDeleteAw, this was a really nice post. In thought I would like to put in writing like this moreover – taking time and precise effort to make a very good article… however what can I say… I procrastinate alot and on no account seem to get something done. online gambling casino
ReplyDelete